


Good morning! Hope you’ve all been doing well. Wow. What. A. Week. it’s been, to start with I got some crushing news on Thursday at my doctor’s appointment, and then on Friday I had a blood test which they ended up getting done rather quickly as we had a phone call mere hours later as my potassium had become dangerously low, lower than last time I’d had it done, so I had to go to the hospital which I was rushed straight through at reception and put on 2 big bags of potassium to start with (one after the other as the first bag didn’t help my levels rise), then a small bag of magnesium followed by a 3rd bag of potassium. Not long after that, I was admitted to the Acute Assessment Unit (AAU for short) where I spent over a day and a half before I discharged myself as they weren’t treating me for my stomach problems which I’d initially gone to the doctors for in the first place, instead, they were trying to insinuate/treat me for something which I’ve been accused of having in the past causing me to have traumatic flashbacks to my past which affected my mental health. And I couldn’t afford to put my mental health at risk again which has taken over a decade for me to feel somewhat safe again. Anyway enough of my rambling, let’s move on-
On with this week’s post, now that I’m back home I can start helping with sorting Christmas out (i.e. Christmas dinner, Presents, Scheduling trips, etc..) which my mum and I started planning in the hospital and something that popped into my head whilst I was in between bags of potassium was cards and photography gifts and then my mind switched to my nephews and taking nice pictures of them. Then I thought ‘Wouldn’t this be a great blog post to do – tips on Child Photography’ to help those who have kids in the family and want to know how to make it stress-free which is especially perfect with Christmas coming up, so here are some tips I would like to share with you!
Photographing children can be a joyful and rewarding process, but it’s also uniquely challenging. Whether you’re looking to launch a career in portraiture or just want to capture moments with your own family, there’s a lot to think about when it comes to photographing kids BUT you can make it easier for yourself by keeping things simple and making good choices when it comes to your camera settings and lens choice.
These ideas will help you if you’re taking photos of your own kids. But they’ll also help you if you’re taking photos of somebody else’s.
Get to Know Your Child Photography Subject
If you have time, try to get acquainted with the child before the photo session. Try to figure out what the child likes, find some common ground, and be a friend of theirs. Don’t be another adult to tell them what to do. Stick to their innocence and playfulness level, take their energy, and make them laugh by being stupid. There is completely no need to ask the child to smile at the camera. Aside from having dull and fake images, you won’t get anything special. Let the child play and enjoy while you prepare for the shot. As soon as the child looks, focus on the nearest eye, and snap a picture. Remember, even without a smile, you can have some emotional and touching photographs. It is essential to build a bond with the child in order to achieve the best results.
Keep Your Gear Simple

You may think that you should take a good selection of lenses with you when photographing children so that you’re prepared for any eventuality. But in reality, you’ll get a better result when you only take one or two lenses with you. That’s because having too many lenses leads to indecision. If your child is doing something interesting you need to be ready to capture the moment. But spend too much time thinking about lenses and you’re likely to miss it. Using one lens also gets you thinking about how to get the best out of it. If you’re using a wide-angle lens, for example, then you can think about using interesting backgrounds. It’s an opportunity to include the setting in the photos. But if you’re using a normal lens, then you can think about setting a wide aperture to make photos with blurred backgrounds. Another advantage of this minimal approach to gear is that you have less to carry. You’re less likely to get tired and more likely to have the energy you need to take photos of an energetic child. If you’re photographing your own children consider buying a small mirrorless camera you can take anywhere. It will help you take photos when unexpected things happen, and you’ll get better image quality than you do from a smartphone camera.
*Don’t be afraid to buy used gear. It’s better to buy an older second-hand camera for a few hundred pounds that you use all the time, rather than a brand new model that you hardly use.*
Get The Camera Settings Right

The next part of the keeping it simple idea is to get the settings right on your camera. Like lenses, if you’re busy thinking about camera settings then you’re more likely to miss interesting photo opportunities. Here’s how to set your camera up so you can concentrate on taking photos.
- Use the Raw format: That gives you the best quality images. It also means that you don’t have to worry about settings like white balance or color profile. You can set them up afterward in Lightroom Classic.
- Set the exposure mode to Manual: Start with the aperture. Set a small aperture (like f5.6 or f8) if you want a sharp background. Use a wide aperture like f2.8 or f2 if you have a prime lens and want to blur the background.
- Set the shutter speed to 1/180 or 1/250 second.
- Use Auto ISO to set the ISO: Activating Auto ISO effectively takes the camera out of Manual and back into automatic mode.
*Note: Older cameras may not have Auto ISO. In this case, using Aperture Priority mode is recommended, and setting an ISO high enough to give you a shutter speed of 1/180 or 1/250 second.*
- Use your camera’s most advanced metering mode: It gives you the most accurate results. It has different names depending on what type of camera you have.
Canon: Evaluative metering
Nikon: Matrix metering
Sony and Pentax: Multi-segment metering
Olympus: Digital ESP metering
Fujifilm: Multi-metering
Apply exposure compensation if the camera is consistently over or under-exposing the photos. With these settings, you can concentrate on getting good composition and capturing interesting moments. You don’t have to worry about what your camera is doing.
Kids Will Be Kids

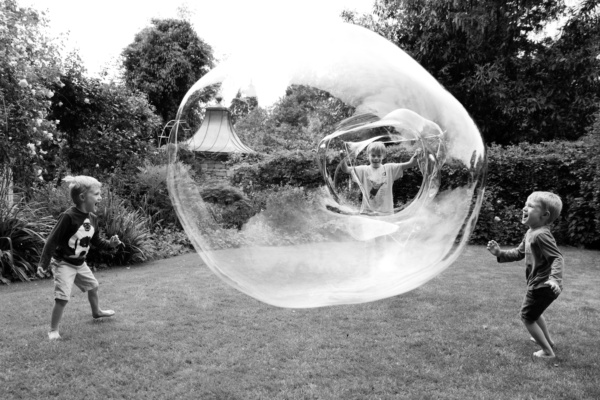
How long do you expect your child/children to stay in one place? Your kid(s) won’t want to stay in one place for long, so don’t try too hard to get them to sit /stand in the perfect spot for the photo. A better approach to photographing your child is to give them something to do and just roll with it. Have your child interact with your husband or wife (whoever is not taking the picture) as they normally would and you will be rewarded with great, natural-looking photos of your children. Do something fun with them – tickle or chase them, pick them up and carry them on your shoulders, or throw them up into the air. Once this happens, your children will be completely unaware that you are taking photos of them.
Shoot Bursts Of Frames

Children are unpredictable and like to move about quickly. This means that photographing children is a lot more difficult than adults. But, this makes for some amazing shots if you know how to set your shutter speed correctly. Set the wrong speed and you end up with blurred images that are useless, too fast and your shots will look grainy. So it’s best to set your camera to fire a burst of frames with continuous focus tracking on. Most midlevel cameras will be able to do this. If you’re shooting in Aperture Priority mode, your camera will automatically set your shutter speed for you. That said, it might be a good idea to set it a little higher by adjusting your ISO. This makes the camera more sensitive to light which results in a higher shutter speed.
Here’s a good guideline for shutter speeds:
Acting naturally — 1/200 minimum
Running — 1/500 minimum
Jumping — 1/1000 or even as high as 1/1600
You might also want to use the burst or continuous mode when taking action shots. This allows you to take a series of photos and gives you a better chance of capturing that perfect shot.
They Don’t Need To Smile
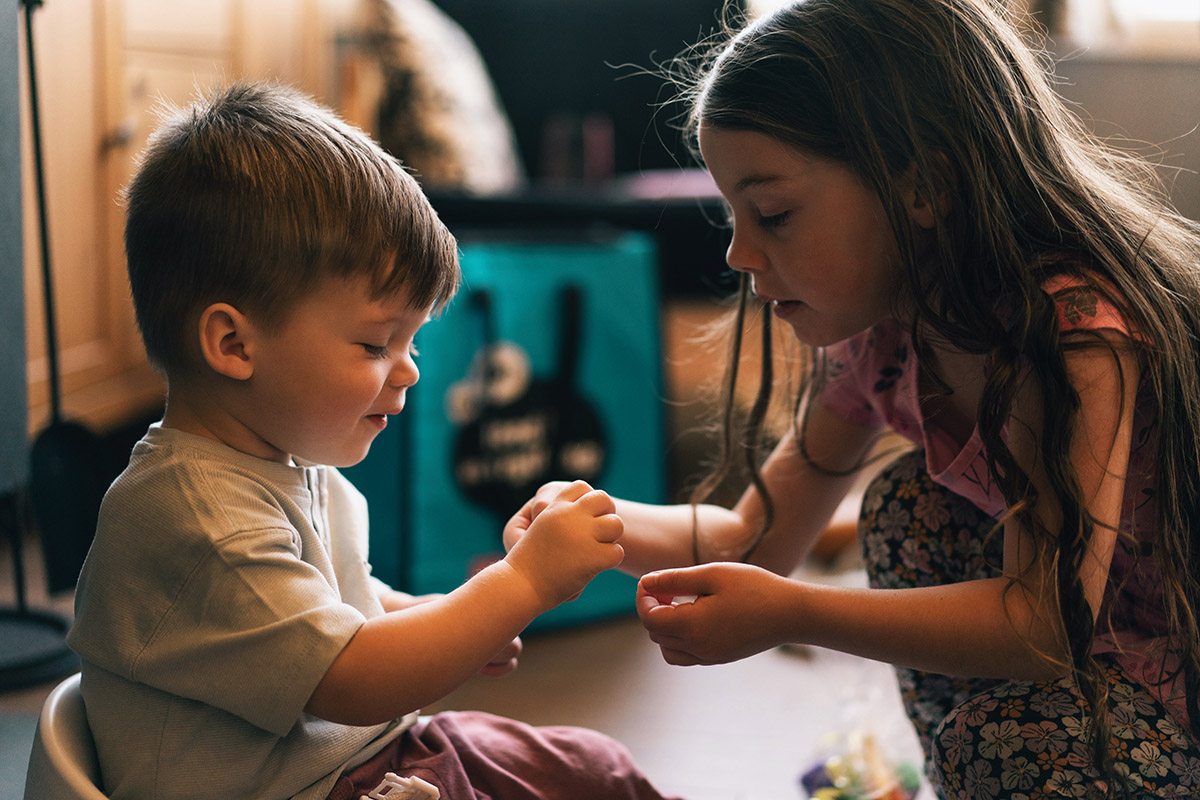
Every parent likes a smiley photo of their children, but it’s not something that should be forced. You’ll want to remember what they were actually like right? So capture their mannerisms, temperament, and something of their character by resting on capturing genuine moments in amongst the picture-perfect photo opportunities. If they’re happy, they’ll smile, if they’re not, they won’t—simple as that. For this reason, it’s better to let a child be themselves and take candid shots. This means letting them act naturally and allowing them to forget that you’re photographing them. This is often how the best kids’ photos are taken. Just let your child be and you’ll be surprised at what you’ll capture, and that leads me to my next point.
Forget The Regular Photography Poses

While it’s better to take candid shots, if you’re looking for a specific pose or shot, you may need to guide them in their actions. This is fine, but instead of telling a child how to stand, encourage them to do something that may result in a similar pose. Even if the shot doesn’t come out quite right, keep moving along and come back to it later. You don’t want the child to feel like they’re doing something wrong if you keep pushing them in one direction.
Props Are Great

The thing about props is that you need to know when to use them and when they are overkill. When photographing kids, can be a huge help not just for their aesthetics but also because they give a child something to do. This type of distraction, if handled well, can allow you to get those candid shots of a kid in action. Use the right one and you might even manage to get a laugh, and nothing beats a photo of a laughing child.
Get Down To Their Level

The one thing you don’t want to do is talk down to a child that you’re photographing. You want them to feel like they’re part of the team and that you’re both working towards the same goal. If this means asking them what they think about certain shots or what they would like to do, then so be it. One of the best ways to photograph your children is to shoot from their viewpoint. Get down and shoot with our camera at their eye level and speak to them as a friend and not as someone who is telling them what to do and what you want. This is the simplest change you can make and it will create a lot more connection in the frame than if you took the shot from your level looking down at them. Try it and see. Doing this also makes you a little less intimidating which is always a good thing around kids particularly if you’re not their parent or a family member. Although sometimes shooting from above can be used really well too if you want to emphasize their scale 🙂
Don’t Tire Them Out

If there’s one that is certain in life it’s that kids get tired at the drop of a hat. With this in mind, you’ll want to keep your session light and try not to be too demanding or ask for too much physical activity from your little subject. As soon as you spot the signs of tiredness, take a break and do something different or just let them sit down and relax for a while. You’d be surprised what a short break will do to restore a child’s batteries. But it’s a fine balancing act—tire them out too much and there’s no way they’ll be able to get back into it.
Get Ready For Mood Swings

Children might get very moody if they’re tired of being photographed. The kids might want to do something fun and different like playing another game or moving to another location. If you feel you haven’t had enough good photos, talk to the parents and see what other approaches you can take. Act a little stupid to cheer the child up. The last giggle you capture could be the best photo of the day.
Find Good Light

The best light for photographing children is ‘soft’ light. That’s light that has a warm character and that doesn’t create harsh shadows, giving the light its flattering quality. You’ll recognize it when you see it. Light is softest towards the end of the day, around 2-hours before sunset. At this time, the light is much less intense and is at a lower angle in the sky and this is what photographers call ‘golden hour.’ If you are shooting in the summer, you’ll be waiting a while for a golden hour because it might be later in the evening than your children’s bedtimes allow. So if you are shooting in the day try to do it as late as possible and perhaps find some shade in the trees but look for hotspots (where patches of strong light break through the tree cover which causes uneven exposure on your child). Autumn/ winter is a great time to be out shooting. At this time of the year, the sun sits low in the sky throughout the day, compared to summer months. This naturally creates a ‘golden hour’ look for most of the day!
*(Bonus tip: If you can’t find soft light, let’s say the sun is too harsh and you’re having to shoot in the summer find some shade, but be aware of hot spots)*
Use Wide Apertures

Here’s where it’s at if you want to know how to photograph your children with a professional edge. Shooting at a wide aperture helps you to create a shallow depth of field. This separates your subject from the background making them stand out, giving your images a three-dimensional feel. It also creates tonnes of gorgeous bokeh- blur produced in the out-of-focus parts of an image which provides an artistic quality to your photograph (a sort of dreamy look). You can achieve this using a lens that has an aperture lower than f2.0 and images look more striking with a telephoto focal length.
Experiment With Your Composition

Photography composition is a huge topic with many rules, and most of these rules can also be broken to still create a compelling image. In the interests of simplicity, I’ll break this down to one piece of advice when photographing children – experiment with placing your child off-center in the frame. In other words, don’t always take the photo with your subject right in the middle of the picture. If you want to get more specific about one of the more popular rules of composition, read the basics of the rule of thirds. By simply placing your child’s face on one of the imaginary lines that divide your frame into 3, you can immediately create a more compelling image. To do this, compose your photo with your subject in the middle and hold down your shutter button halfway to engage the autofocus. Then recompose your image, placing the subject on one of the imaginary ‘rule of thirds’ lines, and press the shutter button all the way down.
Go Macro

We all love newborn babies because they’re adorable and small. Although they’re cute, they’re also made up of many cute little body parts that present a photographer with an array of wonderful subjects–especially if you zoom in on them. If your digital camera has a macro mode or if you are lucky enough to have a purpose-built macro lens, use it to identify a specific body part (like a hand, an ear, a foot, a mouth, etc.) and use it as the full focus of your shot. Doing this emphasizes the detail that is often missed in the shots that many of us take, and you’ll find that your entire collection of photos is beautifully punctuated and can even make excellent feature shots.
Experiment With Focus Points

Normally in portraits, you will want to focus on the subject’s eyes. But with baby portraiture, you can create some striking images by breaking that rule every once in a while. Because babies are so small, parts of their body such as the hands and feet can make interesting subject matter. If your camera has a touchscreen, like the Canon EOS R10, it’s a simple case of touching the part of the screen where you see the fingers or toes to focus. Using a large aperture will blur everything else in the picture, keeping the focus firmly on the feature you want to emphasize.
Focus On The Eyes

If your camera can control the focus point manually (i.e. not the camera deciding where to focus by itself), stick that focus point right on the child’s eye. If they’re not facing you, focus on the nearest eye. The eyes always need to be in pin-sharp focus, and ideally, they’ll show mostly the iris/pupil, as opposed to mostly the white area. Eyes in a photo attract the viewer’s eye and make the image instantly more alluring. If you really want to make your child’s eyes stand out, try and get a ‘catch light’ in them. This can be achieved by ensuring there’s some light falling on your child’s face, and can really help the eyes come alive.
Choose A Simple Background

A busy background can be distracting. It’s important to remember if something is in the frame that doesn’t add to it, it takes away from the image (some clothes can be distracting too). You’ll be more aware of this when you’re taking photos of your children around the house. Have a quick scan of the room and pop away anything unsightly in the background. There will be fewer distractions out in the open like a park, but be mindful not to accidentally include a bin in the frame, or if you are in a really dense woodland, try not to have a tree trunk poking out from one of your children’s heads. When out and about if you can’t find a way to rid yourself of distractions, find another spot, or if you shoot at a wide aperture with a medium-long focal length you can practically shoot anywhere if you have enough working distance because you can render the background well out of focus.
Use A Timer

Every camera these days has a self-timer. Even your phone has a timer, so next time you’re out with the family, set it up on a flat surface and get a DIY group family shot! I’d recommend setting your camera up to shoot a few photos in quick succession to increase the odds of one of them coming out well. Some cameras offer Bluetooth connectivity which means that you can see your camera’s screen on your mobile phone screen, making it much easier to compose the shot and get the right moment.
Practice, Practice, Practice

Whether you’re an aspiring photographer or a parent who just wants to take amazing photos of their child, you need to keep practicing your craft. And by that, I don’t just mean taking photos but taking photos of children. So offer to take some photos of your family members’ kids or see if any of your friends would like a free photo session in the park. Whatever you do, keep practicing. One last thing we will say is that you must always be respectful of others, especially children. If they don’t want you to take their photo, respect their wishes and stop. Just like adults, sometimes children just want a little privacy and that’s okay.
Don’t Worry — you’ll get better with practice!
Enjoy It!

The most important thing is that you enjoy it. This goes for both you and your subject. Remember why you are doing it in the first place. It’s not purely because you want photos that you are going to sell but because you want to capture your family at their best. Kids love to have fun and they react well to grown-ups who also like to enjoy themselves. In fact, you’d be surprised at just how many professional photographers really let the inner child run riot when photographing children. Encourage a little bit of silliness now and then as this will help a child relax and feel more at ease. And when they’re relaxed, that’s when you’ll see a child acting naturally. On top of that, you’ll also find that the session will go much more smoothly and everyone will be a lot happier too.
**BONUS — Learn Lightroom**
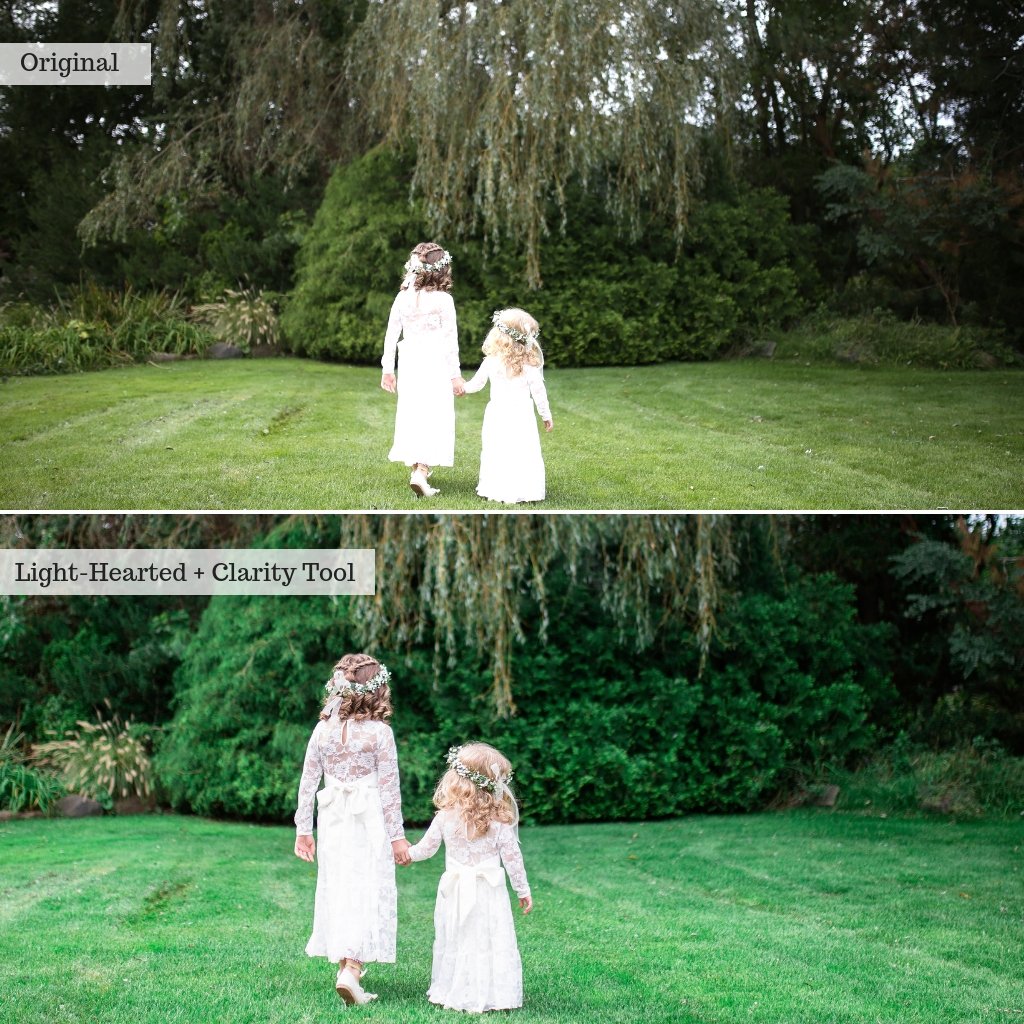
I know this one’s a really broad tip that does require some investment of time, but being able to make small edits to the photos of your children in Lightroom can make a world of difference to how they look. Lightroom is a great imaging software since it’s very accessible for amateurs but powerful enough for pros. The cost is not too high (click here to find the best place to buy Lightroom), and unlike Photoshop, you can pretty much guess how to use it after fiddling around for a few minutes. In simplest terms, Lightroom allows you to ‘rescue’ a photo that’s too dark or too light, by editing it after you’ve shot it. I’d also recommend you shoot in RAW format to maximize the amount of dynamic range you can get from a photo – see RAW vs JPEG. Of course, there’s a whole world of various edits you can make to your photos using Lightroom, but if you’re time-poor (i.e. most parents out there!), I’d stick to playing around with the ‘Basic’ sliders in the Develop module until you see a look that you like. When photographing children, getting the shot is the first hurdle. If you really want to make the most of that photo (and you have the time), post-processing it with software such as Lightroom is essential.
If you are a budding photographer or just want to get the best portrait photos possible of children, you must make it interesting and fun! Making child photography sessions enjoyable means that your subjects will want to do it again, and again! Get them involved and let them take some pictures of you, too, for a change! Show them all the photos afterward and help them choose the ones they like best or how to edit them. Child photography is fun, but it needs a few tricks and strategies to make each session fruitful and productive.
Thank you for visiting my blog and reading today’s post, I hope these tips and tricks help you progress with child photography whether you take it up as a profession or even just to help you with taking pictures of your child or of any other children in your family. For now, though I shall say wrap up warm and I will see you next week!


WOW … very informative. Thank You!
LikeLiked by 2 people
very informative post Peyton – thank you for this! more importantly though, I hope you are feeling better after your hospital visit. I understand why they needed to treat your potassium levels but they should have treated you for what you had gone in there for in the first place. and I can empathize with your disappointment. Mike
LikeLiked by 1 person
Wow, what a week you’ve had! I’m really sorry you had to go through all that, but I truly admire how you’re channeling your energy into something creative like photography. Prioritizing your mental health was absolutely the right call, and I hope you’re feeling better now.
Your child photography tips are amazing! Keeping things simple, capturing real moments, and letting kids be themselves makes such a difference. If anyone wants to enhance their photos easily, Photoleap is a fantastic tool, it helps adjust lighting, colors, and even add creative effects without making pictures look over-edited.
LikeLiked by 2 people