
Good morning lovelies, hope you’re all well. I’m not going to ramble on too much as I’m sure you all have busy lives and things to do that you need to get back to, plus there’s not really much for me to tell you about, as this week has been pretty quiet compared to last week, where we were out almost everyday, so it’s been nice to just relax and recharge, especially as next week, it’s going to be a busy one again, but I will tell you about that in next Wednesday’s post! One scary thing that did happen, which unfortunately can occur in people with CFS/ME, is last Thursday night I suffered from periodic paralysis, which if your unsure of what it is, it means sudden attacks of short-term muscle weakness, stiffness, or paralysis that may affect the whole body or just one or two limbs, if you want to know more >click here<. It took a while for me to start regaining any function again as of course it attacked my whole body, but it was quite scary at the time. Anyway, lets get on with today’s post…
World Space Week (WSW) is an annual holiday observed from October 4 to 10 in over 95 nations throughout the world. Officially defined as “an international celebration of science and technology, and their contribution to the betterment of the human condition”. World Space week is organized every year by coordination of the World Space Week Association (WSWA) and the United Nations (UN). Organizations such as space agencies, schools, planetarian, and museums coordinate space outreach events in various parts of the world. Today, the W.S.W.A. oversees an international team of national coordinators who arrange events within their own countries. The W.S.W.A. aims to enlighten people about the benefits of space and build their interest through participation, using World Space Week as the crown piece. Their efforts come to fruition as World Space Week is currently observed in over 90 countries, making it the most extensive space event. So in order to celebrate the wonders of space, I thought I would incorporate my passion of photography and do a post on Astrophotography A.K.A the art of taking pictures of not only space but the solar system as well, and how to get started.
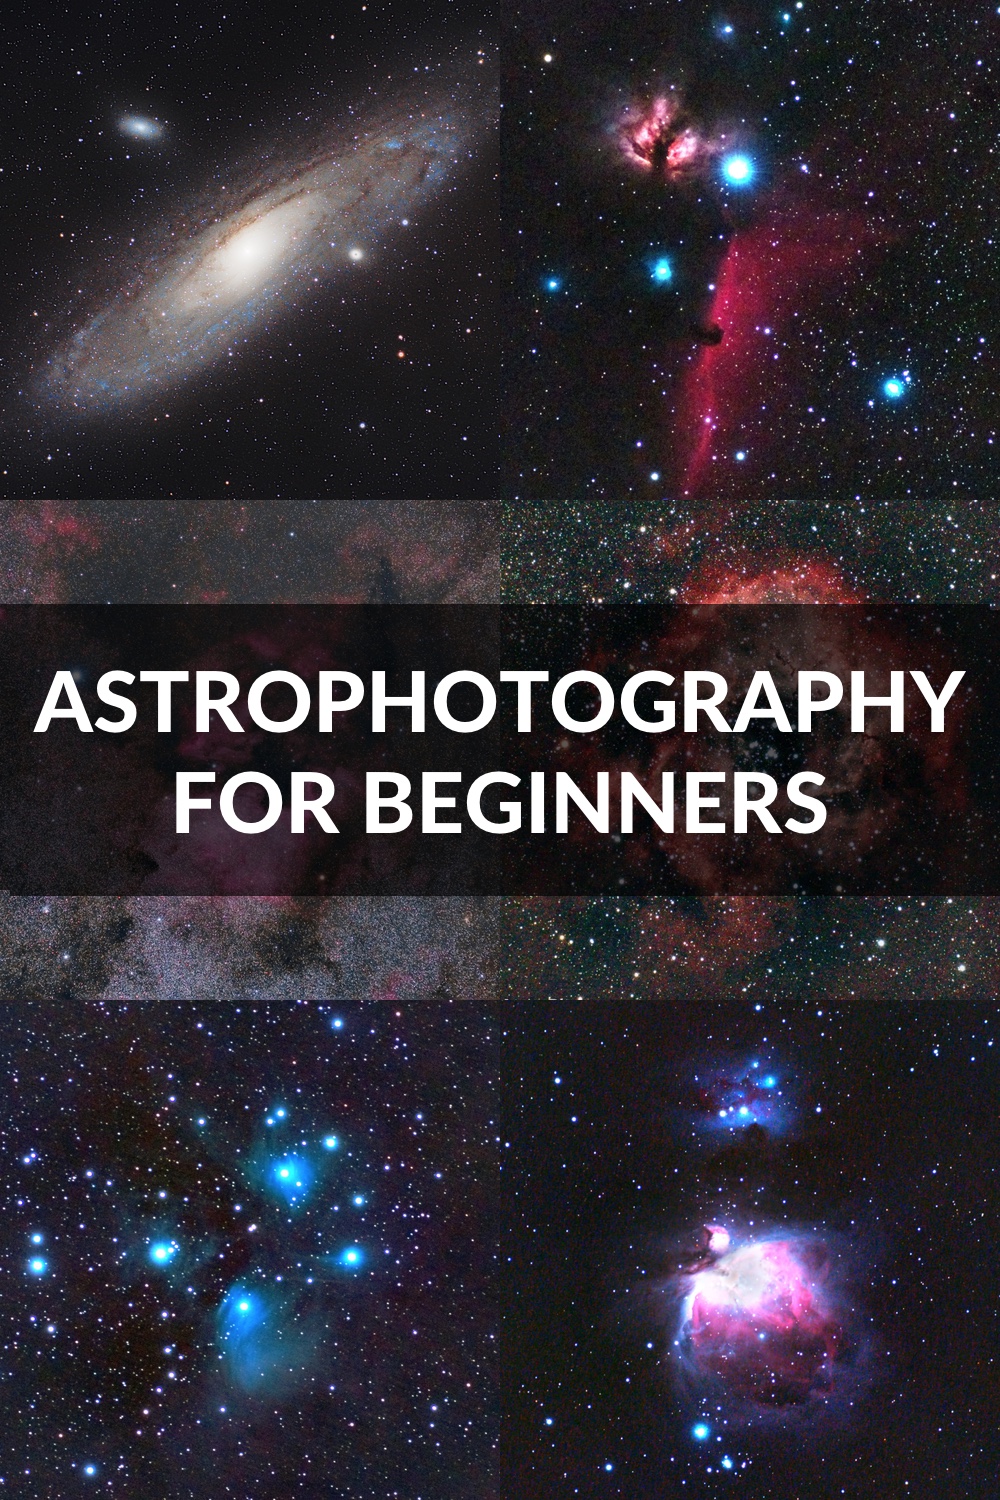
Astrophotography is the term given to the art of photographing the night sky, and it’s surprisingly easy. Armed with a DSLR or mirrorless camera on a tripod-mounted tracker, even novice Astro-photographers can capture great shots of star clusters, nebulae, galaxies and other deep-sky objects. But it’s even possible nowadays to photograph the night sky with your smartphone. Capturing the night sky for posterity is indeed a gripping passion and there are many camera functions to uncover and much to consider when creating an imaging setup. As a hobby, astrophotography requires two types of investment. The first is financial: you’ll need a camera, at least one lens, and a few accessories, as well as a warm coat for cold nights spent under the stars. The second investment is time and patience — though these are things you sadly cannot purchase. You might wish to photograph nightscapes: images that are similar to the views of the constellations and the Milky Way that you would see with the naked eye. Or perhaps you want to photograph the Solar System via the Moon, the Sun and the planets Or extend beyond the influence of our star and into the realm of deep-sky objects such as globular clusters and nebulae.
Astrophotography is a photographic style that’s tricky to get right the first time and will take many attempts, iterating on the same ideas until you can finally provide an image that’s got some real ‘wow’ factor.
Cameras & Lenses for Astrophotography
DSLR’s
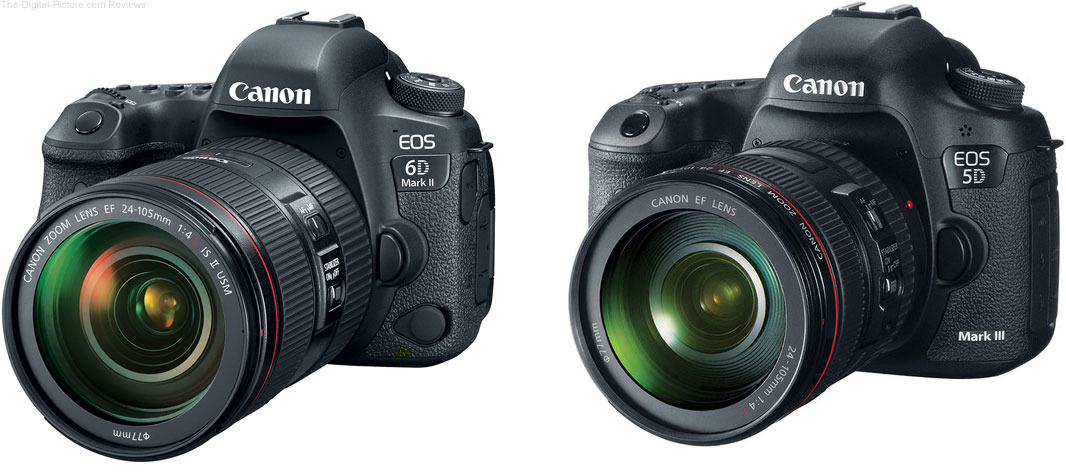
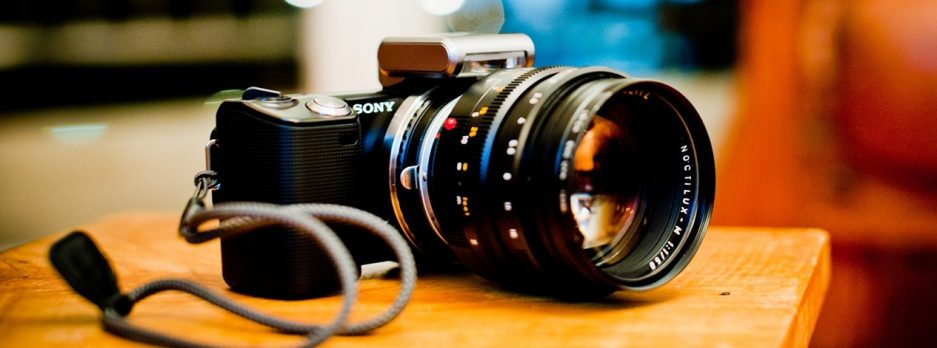
Full frame cameras generally perform the best in low light situations as they have a larger sensor and can have larger individual photosites that capture more light. For basic astrophotography you’ll need a DSLR or mirrorless camera with a manual mode. Since deep-sky objects are faint, imaging them is about opening the shutter for as long as 90 seconds to allow as much light as possible to hit the camera’s digital sensor. A DSLR with great low light capabilities is perfect for astrophotography. Ideally, you want a full framed sensor camera like the Canon 5d MkII and MkIII or the Canon 6D, as you want to have the maximum sensor area to capture as much light information as possible. You can also get reasonable results with crop sensor cameras like the Canon 7D, which may suit your budget a little more than the full-framed counterparts. You’ll also need a 38mm ball-head mount so that the camera can move independently of the tracker once it’s in a fixed position.
Other Camera Options:
Smartphone camera
Daylight phenomena and bright twilight scenes; afocal shots of the Moon and bright planets through a telescope, the latest models can now even take basic constellation images. The Google Pixel 6 Pro is undoubtedly one of the best smartphones for astrophotography, and here’s why. With its powerful camera system, cutting-edge features, and the renowned Google Camera app, this device is well-equipped to capture the beauty of the night sky. The Google Pixel 6 Pro boasts a remarkable low-light performance thanks to its large 50MP main sensor, which allows for more light to be captured by each pixel, resulting in clearer and more detailed images. Additionally, the device utilizes Google’s Tensor SoC, which further enhances the camera’s capabilities by incorporating AI and machine learning algorithms to optimize the photography experience. This ensures users can use the phone’s hardware to produce stunning night sky images.
Planetary cameras and webcams
Planetary imaging requires a telescope and you’ll find that reflectors are most suitable because of their long focal lengths. If a planetary camera is also coupled with a 2x Barlow lens you’ll be able to achieve the magnification required for planetary detail, while the camera’s high frame rate will allow you to cut through atmospheric turbulence. If a planetary camera is also coupled with a 2x Barlow lens you’ll be able to achieve the magnification required for planetary detail, while the camera’s high frame rate will allow you to cut through atmospheric turbulence. You’ll require a laptop to run these cameras and, as you’re viewing an object up close, a solid tracking telescope mount is also needed, which allows you to keep the planet central in the field of view.
The Bresser full HD is aimed capturing images of planets, the Moon and also some basic deep-sky imaging. It picks up fine details to make your shots truly stand out. The camera can even record high-definition video, opening up a world of artistic possibilities. This is a decent camera that will enable Astro-photographers to capture a range of targets including the Sun, our Moon and deep-sky objects.
CMOS & CCD Cameras
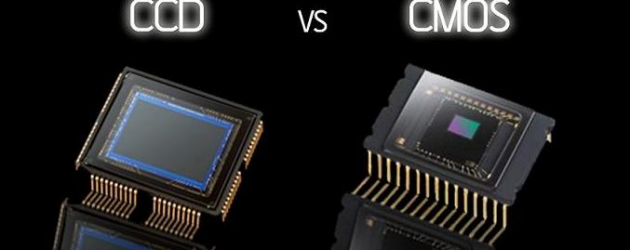
CMOS and CCDs are ‘dedicated astrocams’ designed to be fitted to a telescope. Each comes in ‘colour’ – for RGB (Red, Green and Blue) imaging – or ‘mono’ variants. Mono cameras require the use of colour or narrowband filters.
CCD (charge-coupled device) cameras are suited for long-exposure astrophotography (10-plus minutes per frame) because they have ‘set-point’ cooling systems that keep the sensor temperature constant, which is known as ‘active’ camera cooling.
CMOS sensors perform better with shorter exposures and come as either actively or ‘passively’ cooled.
Laptops are needed to run either device. To maximize CCD exposure times, additional accessories – including guiding equipment and software – are often required.
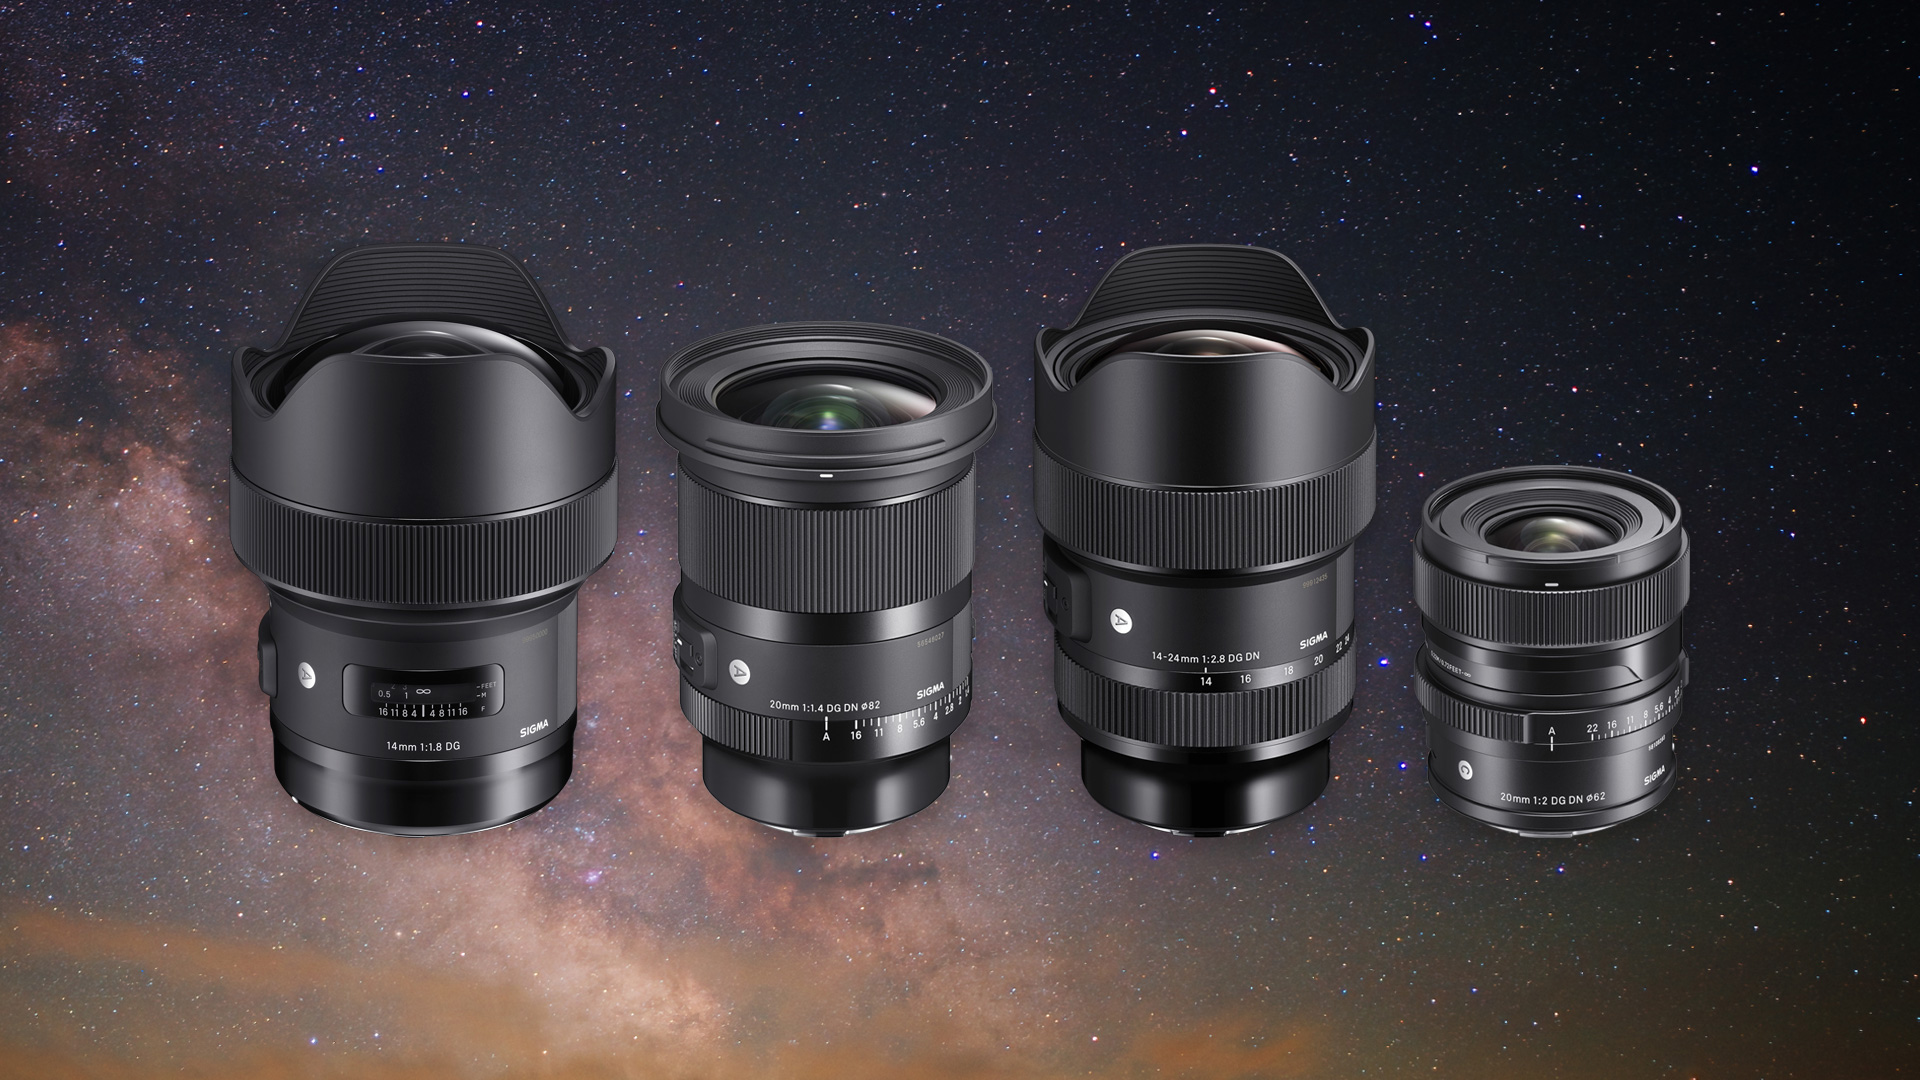
When it comes to lenses, a wide or super-wide angle ‘fast’ lens somewhere in the 12-35mm range is best suited to landscape photography and astrophotography. Wide-angle focal lengths allow you to capture a good portion of the night sky as well as some of the landscape for foreground interest. A ‘fast’ lens is one that has a large maximum aperture — in other words, a small f-stop number. A lens with a maximum aperture of f/2.8 or lower is considered to be a fast lens, though many Astro-photographers opt for prime lenses with apertures of f/1.8 or lower as they tend to be sharper and better for astrophotography. Another thing to consider is the focal length of the lens. The longer the focal length, the more “zoomed in” the image will be. That’s why a wide angle lens is recommended, so it captures a larger surface area of your images. A recommended focal length is anything less than 35mm.
Equipment
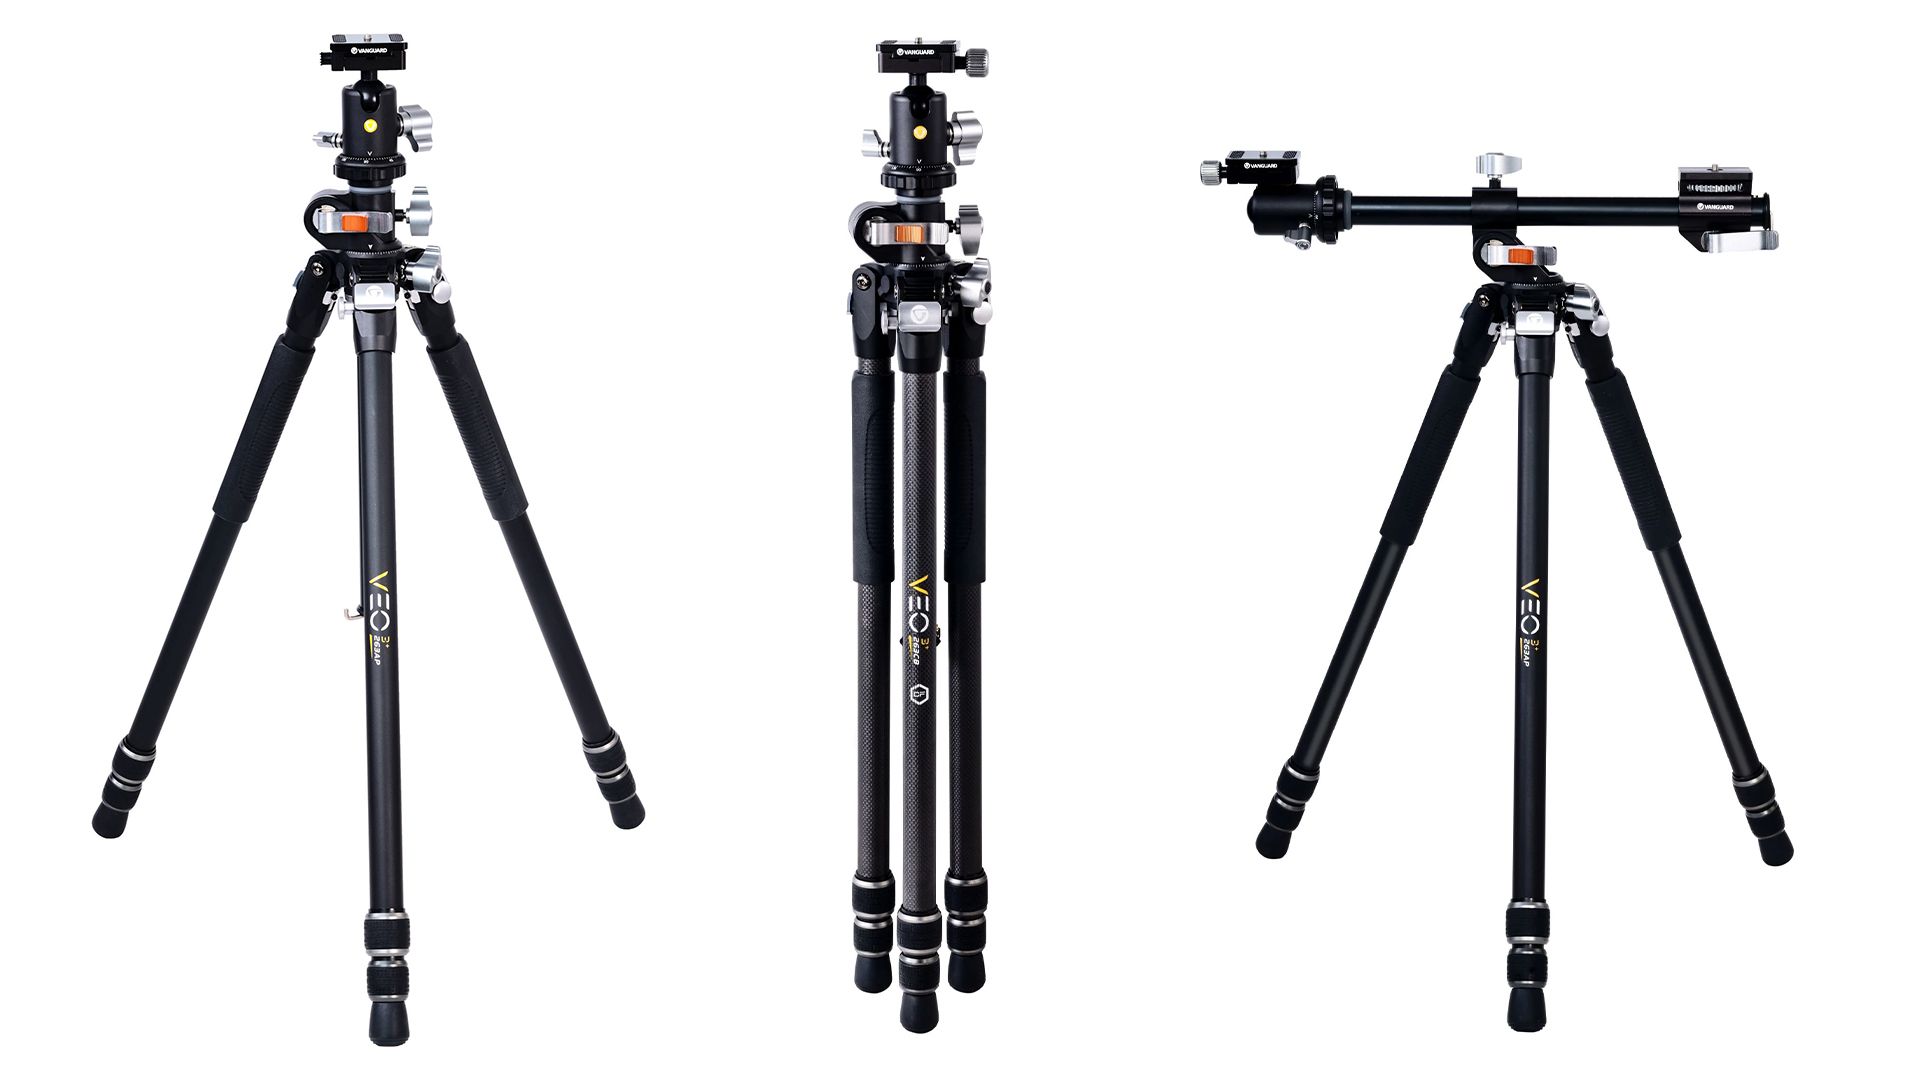
Believe it or not, a tripod is one of the most important pieces of equipment you can have for astrophotography. A tripod is essential for astrophotography as you simply won’t be able to hold the camera still enough by yourself for the long exposures required, and resting it on a wall isn’t always possible. The tripod’s smoothly tilting head also allows you to position your camera perfectly to capture the bit of the sky you want. You need your camera platform to be rock solid as you will mostly be dealing with exposure times of 10-30 seconds, so it’s important to have a sturdy tripod that will keep your camera in place.

This is a button on a cable that will allow you to trigger your shutter to minimize the risk of introducing vibrations in the camera. You just plug it into the appropriate port in your camera, and press the button on the cable instead of the button on the camera. These are very inexpensive, although, you can get wireless ones that cost a little more. If you don’t have a remote shutter release, you can instead use the timer delay on your camera to ensure there is no movement of the camera when taking a shot. Some DSLRs have a mirror lockup function that prevents the movement of the mirror inside the camera body from inducing vibrations, but this isn’t necessary for mirrorless cameras.
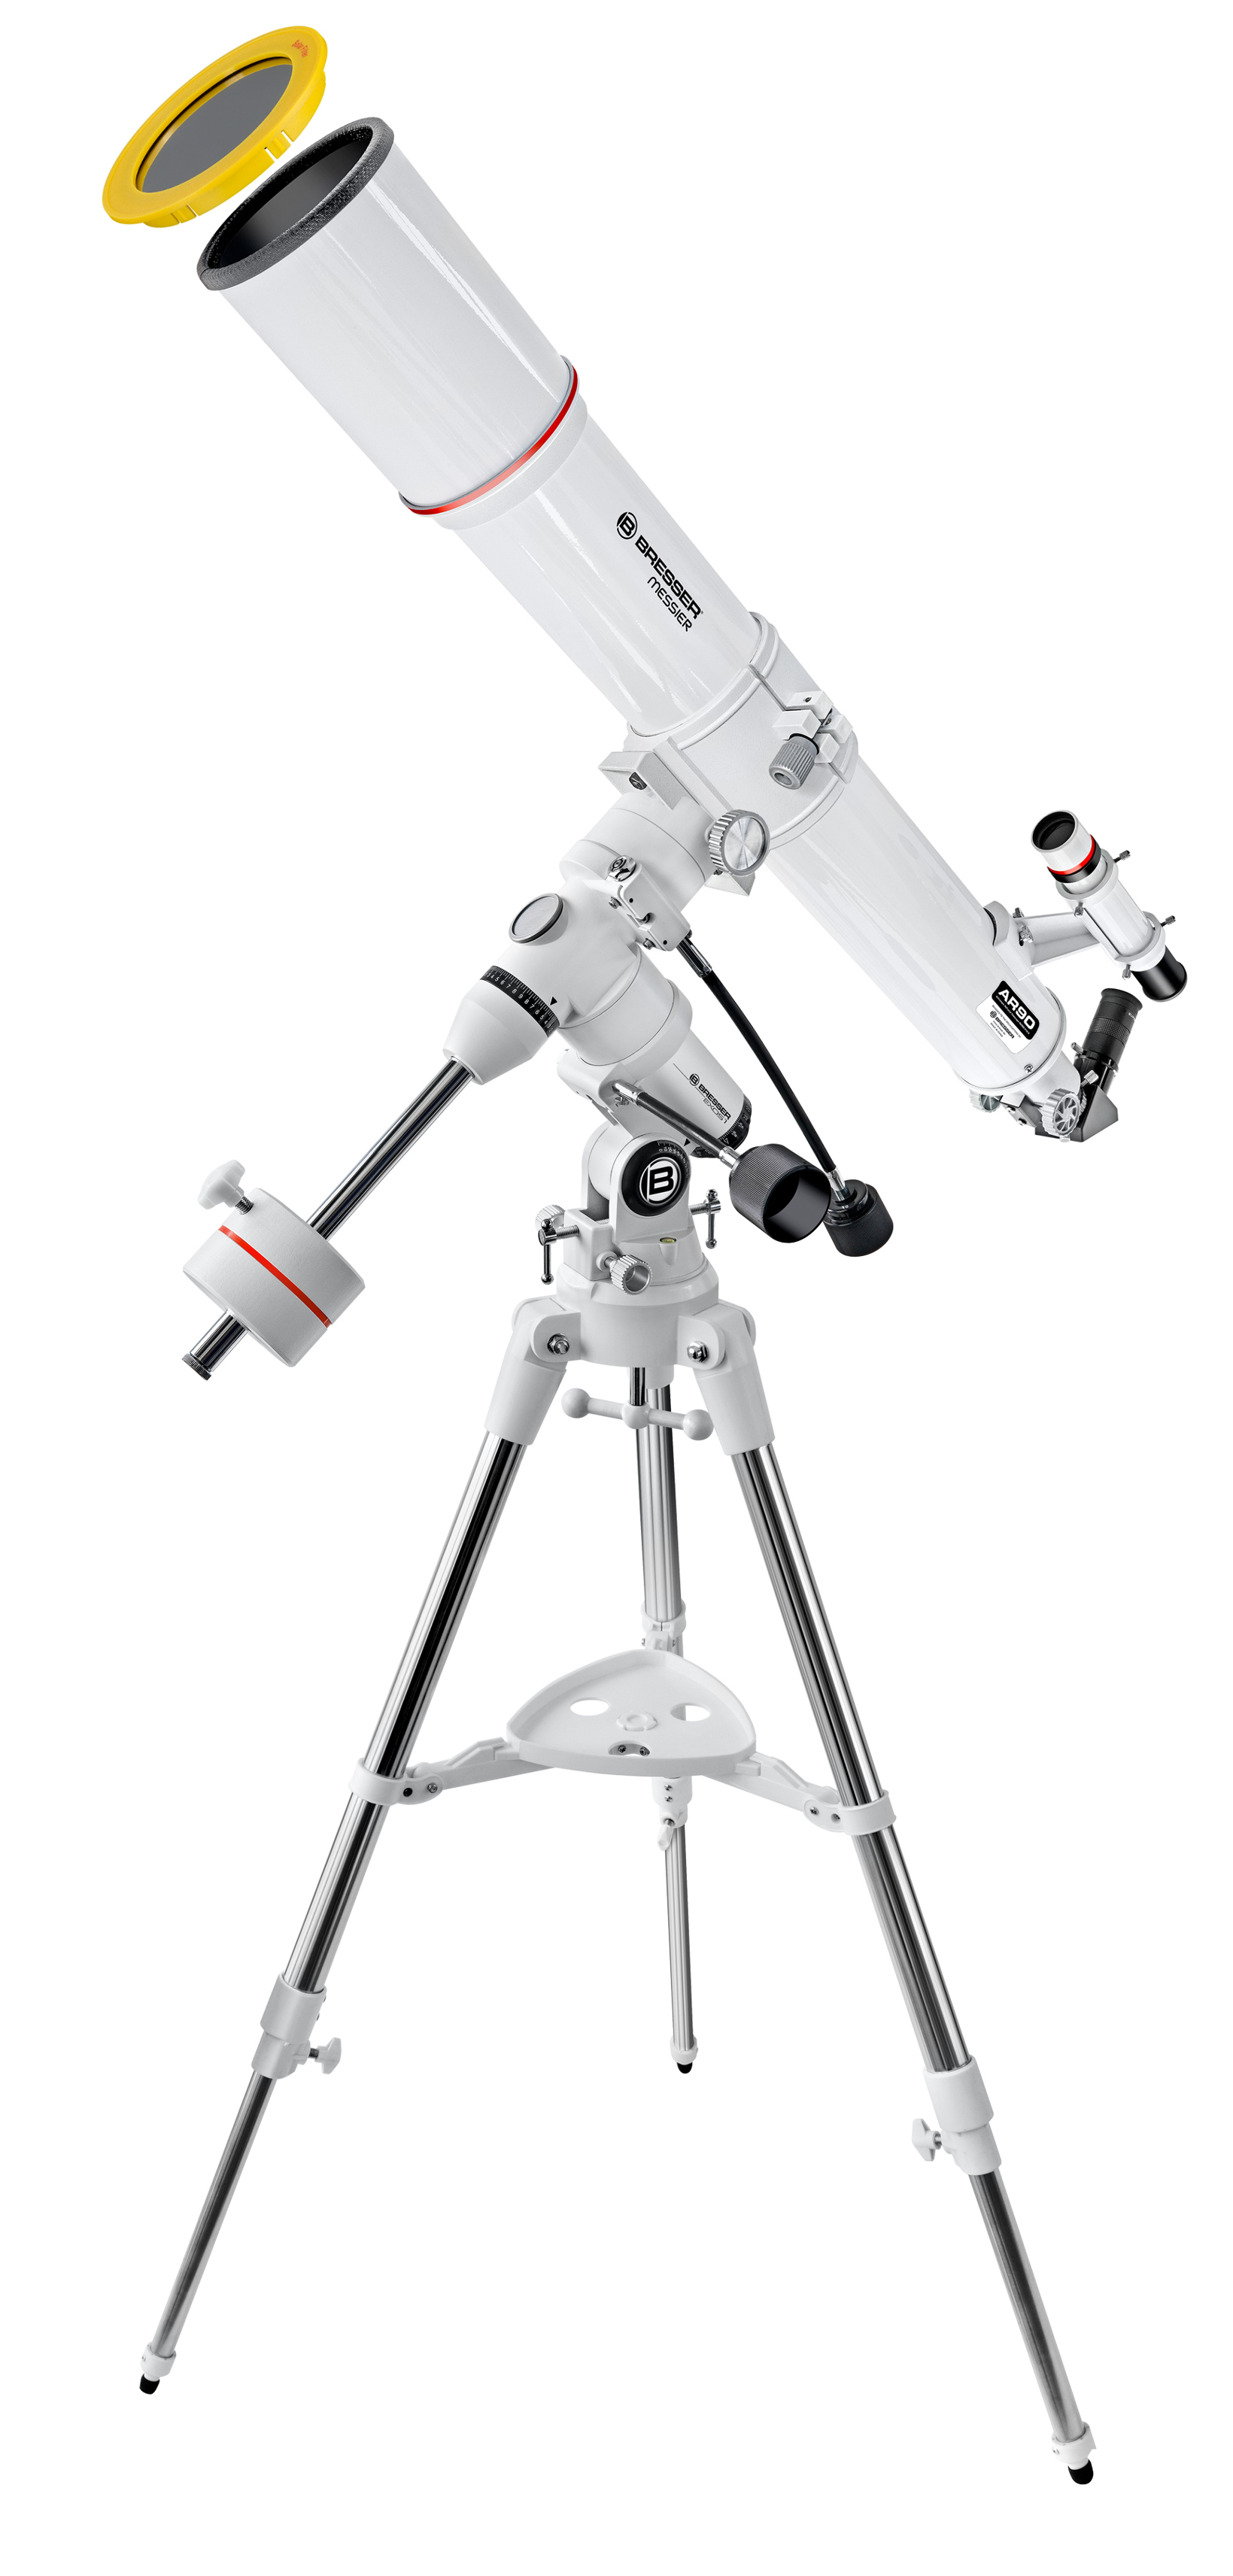
Telescope
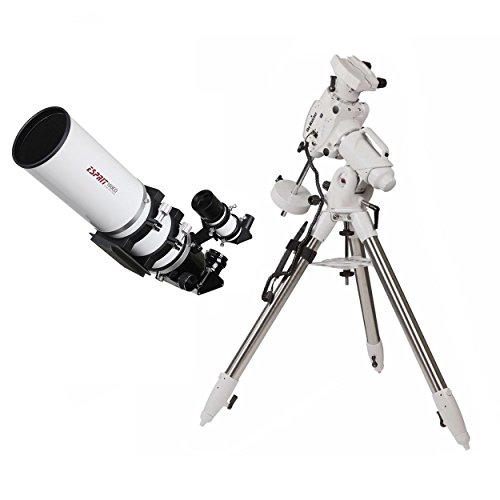
There are a couple of factors you’ll want to keep in mind when choosing your telescope. It is wise to consider what you want your astrophotography telescope to actually do. Are you hoping to take a detailed picture of the moon’s surface? Or are you more interested in capturing the stunning Orion Nebula and nearby star-forming regions?.. Most importantly, you’ll want to choose a telescope with a motorized mount, which will let you use longer exposures to capture the more elusive wonders of the night sky. Focal length, aperture, and more advanced features like WIFI connectivity and automatic alignment are all things to consider when looking for a telescope. The telescope you choose to pair with that camera will have a massive impact on both your early image results and the user experience and the overall enjoyment of the hobby of astrophotography. This is especially apparent when choosing the telescope type, as some types of telescopes present a steeper learning curve than others. You can’t go wrong with a triplet apochromatic refractor like the Sky-Watcher Esprit 100. At a focal length of 500mm at F/5.5, it can capture brilliant nebulae, large galaxies, the moon, and more. Your astrophotography telescope and camera are important pieces of your setup, but not as critical as the equatorial telescope mount you’re using. As a general rule of thumb, it is best to keep the weight of your astrophotography telescope, camera, and all accessories to about half of the maximum recommended payload capacity of your telescope mount. No matter which telescope you use for astrophotography, accurate polar alignment is crucial. A telescope won’t work without an eyepiece. When you get your first telescope, it will generally come with a stock eyepiece. As you progress on your Astro journey, you may want to upgrade your telescope eyepiece, just like a camera lens, they change the telescope’s magnification.

Keep your hands free to operate your camera by using a headlamp at night and, if possible, use the red light mode (if it has one) to preserve your night vision. A headlamp is also helpful for ‘light painting’ objects in the foreground of your images — either creatively or just to improve the exposure. Alternatively, a flashlight with a bit of red plastic over the end can achieve the same thing. Finally, if you’re going to be shooting in cold temperatures, it might be worth investing in some kind of lens heater. These can prevent condensation from creeping into your lens and ruining your shot.
Camera Filters
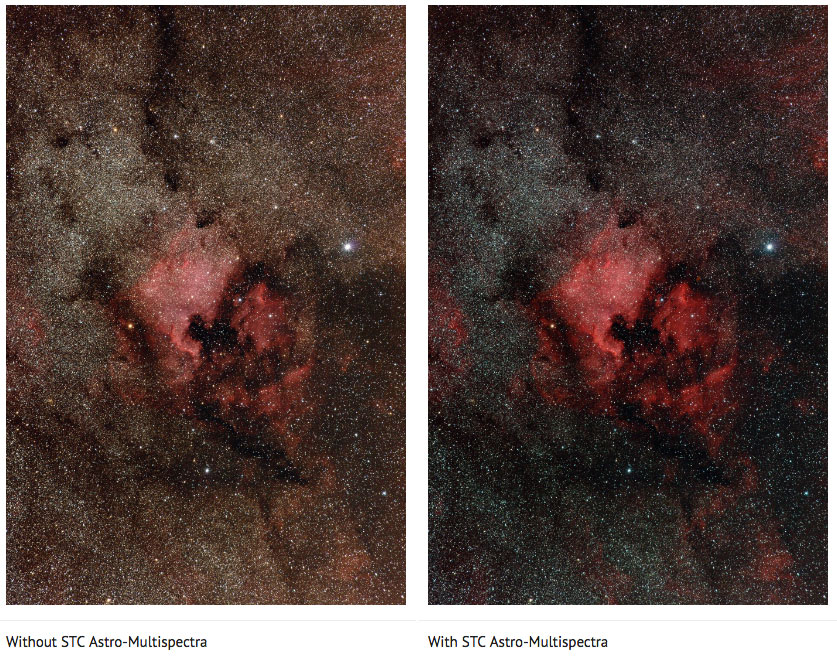
Camera filters will help improve your images during a night photo shoot. There are quite a few different types of filters which all do a different job. For example, the most common use is a filter to offset the light pollution from the city light glow. If you live in the red zone (DarkSiteFinder.com), then it will be quite a challenge to try and capture any long exposure. As far as installing them, if you get the clip in style, they clip in-between your DSLR astrophotography camera sensor and your lens, so they are a reasonably straightforward and easy install. Other various types of filters are:
- CLS: City Light Suppression
- LPS: Light Pollution Suppression
- Narrowband Filters
- Line Filters
- Color Filters
- Solar Filters
Extra Batteries

The last thing you want is to be midway through a photo shoot and your batteries to go flat. Because of the nature of astrophotography, you will end up taking lots of images of the night sky. Handy tips: the cooler night temperatures will drain your batteries quicker than usual, so another reason to have a few extra batteries handy.
Plan Your Astrophotography Shoot
Location
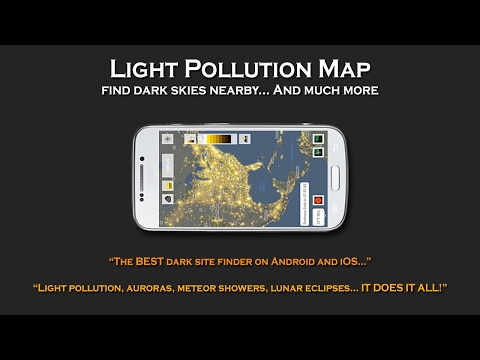
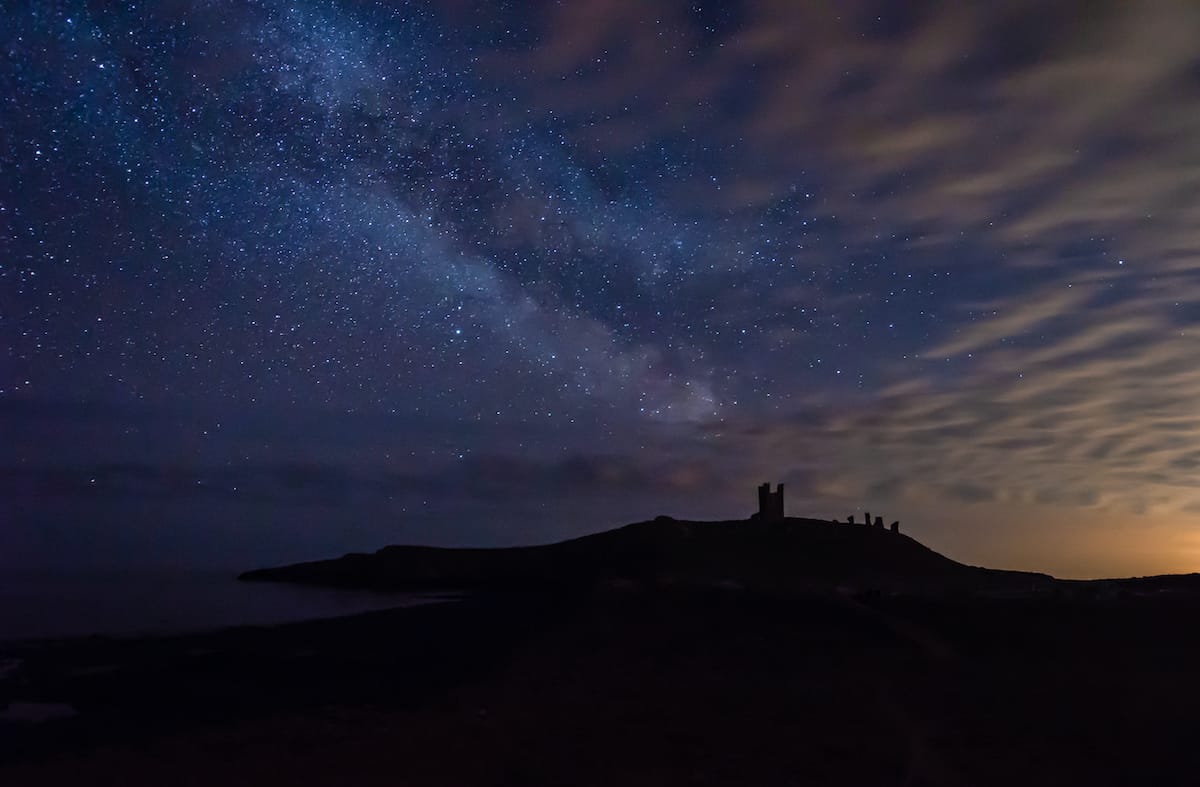
The first step is to find the darkest spot possible for your astrophotography setup. Light pollution is a serious problem that Astro-photographers often have to overcome. You’ll need to be in a dark sky area to be able to capture really detailed images of the night sky, so make sure you head away from urban areas and street lights. There are some really useful websites such as Dark Site Finder and Light Pollution Map that will help you to find a suitable location to shoot. You’ll also want to get weather reports and guidance on where to point your camera when you shoot. The best stargazing apps only cost a few dollars/pounds, and they’re extremely helpful when it comes to selecting your location and knowing the best time to shoot. Useful websites:
– DarkSiteFinder.com – this site name doesn’t leave a lot to the imagination but does precisely what it says. An excellent tool for finding dark sky locations, you can use this pretty much anywhere as it covers the entire earth.
– Lightpollutionmap.info – Another site for track light pollution and is useful for finding dark photography locations close by.
Moon Phase
There are some handy apps to help determine the darkest times of the month. Ideally, that is when you want to be planning to get out there to capture those stellar photos. The apps below allow you to see the moon phases for the month. Very useful, indeed.
Bushwalking Safety
Many Astro-photographers prefer to capture images in locations like national parks and campsites (where your away from the big city lights the light pollution is minimal). So like everything else, try and come prepared, because if you are setting up somewhere a little more isolated away from the town you will need all your essentials with you in case of an emergency.
Warm Clothing
Wear or at least take warm clothes with you (gloves also!), since nighttime temperatures can drop significantly and become uncomfortably cold during night time. You don’t want to stop a good night photo session just because you’re freezing, which can happen when you stand or sit around for long periods. Come prepared to bring warmer clothing than you think you’ll need, just in case. Especially if your planning to trek on a northern lights photography trip as the temperature there can and regularly does fall below -0°C. A few items you should think about adding to your bag:
- Headlight
- Flashlight
- Compass
- Warm clothing
- Gloves (ones that also work on your smartphone)
- Hiking boots
- sleeping bag (while waiting)
Weather
Checking the weather ahead of time is another simple but often overlooked task when heading out for an astrophotography shoot. If you’re doing a quick photo shoot in the backyard, then it’s not such a big issue. But if you plan on going for a drive and taking your equipment with you to setup then checking if it’s a cloudy night or a clear sky becomes so much more important.
Astrophotography Camera Settings
Manual Focus

Put the camera into M, or Manual mode using the mode dial on the top of the camera. This will give you the ability to alter the shutter speed, aperture, and ISO manually rather than having the camera do it for you. When you’re taking a photo of the Milky Way, you usually want the stars to be sharp and in focus. New cameras have fantastic auto focus capabilities, but even the best, most expensive cameras struggle with focusing when it’s pitch black outside. Get rid of the margin for error by switching your camera to manual focus and adjusting it to make sure the stars are sharp.
Infinity

Adjust your lens focus and bring it to infinity (most lenses have an infinity symbol). Infinity focus is usually a good starting point for capturing the starts with a wide angle lens. If the stars look a little out of focus, make a slight adjustment to just before infinity. You’ll need to test this a little to find the sweet post for your camera lens. Also, and often overlooked, is your lens may have just fogged up if outside temperatures are cold. Shine a light on your lens to check, and if it has, a quick wipe with a microfiber cloth will clear it up.
Aperture
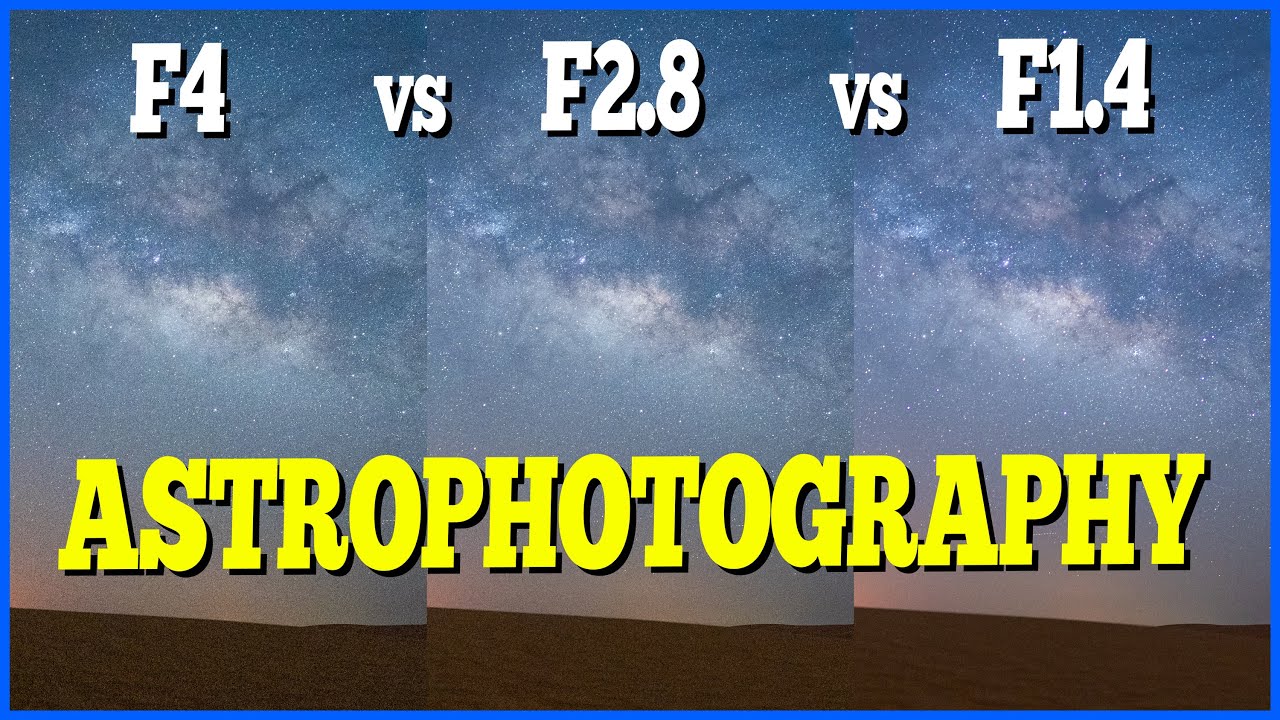
You want your aperture as wide as possible in almost all Astro situations, so set it to an f-number of f/4 or lower. We usually recommend f/2.8 or lower but use the maximum your lens is capable of. Many DSLRs and mirrorless cameras use a wheel on the camera body to set the aperture, but manual lenses and some made for Sony mirrorless cameras have an aperture ring on the lens itself.
Lower F numbers always mean wider apertures and greater light-gathering ability — this is why prime lenses with apertures of f/1.8 and lower are generally favored for astrophotography.
ISO sensitivity
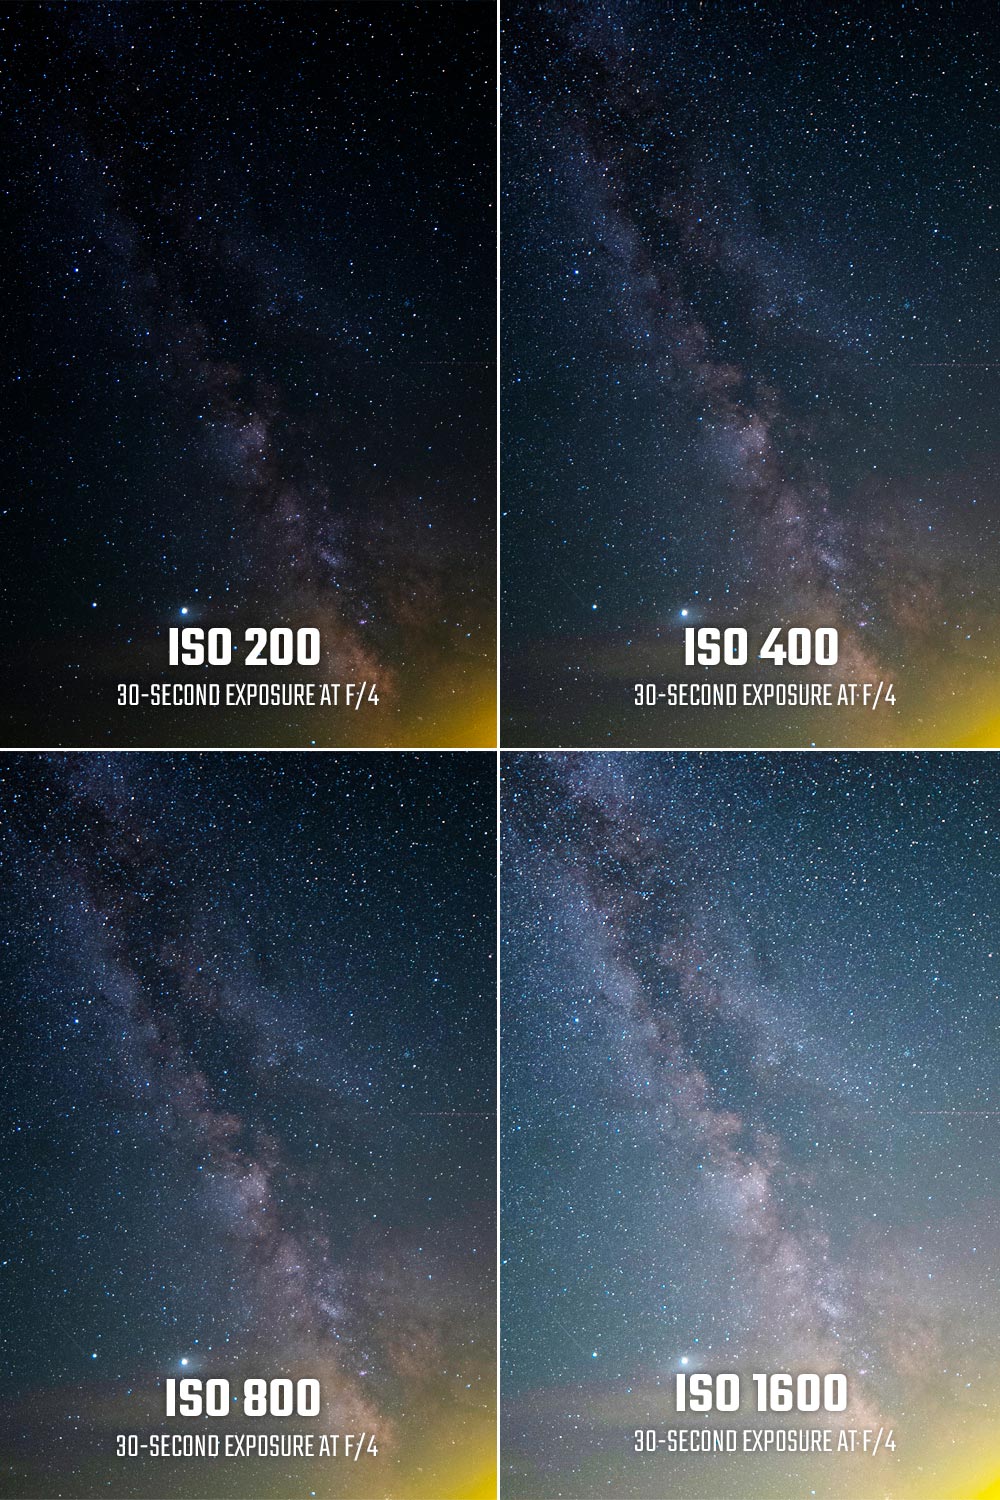
The higher the ISO, the more amplified the light signal captured by your camera’s sensor will be. You will need to shoot at a high ISO for astrophotography, but there’s a trade-off — the higher the ISO, the more noise (a type of digital degradation) you will begin to see in the image, and every camera increases noise in a different way. ISO ranges do vary depending on the camera but can have the range of anywhere from very low sensitivity (100) up to very high sensitivity (12,800) in high-end cameras. The higher we set the ISO setting, the brighter the image will be that we capture. The offset to this is the higher we go in ISO range, the more noise and grain we add to the picture. A recommended starting ISO range is usually between 800 – 1600. If the image is still too dark, then adjust the ISO up to 3200.
Image File Type
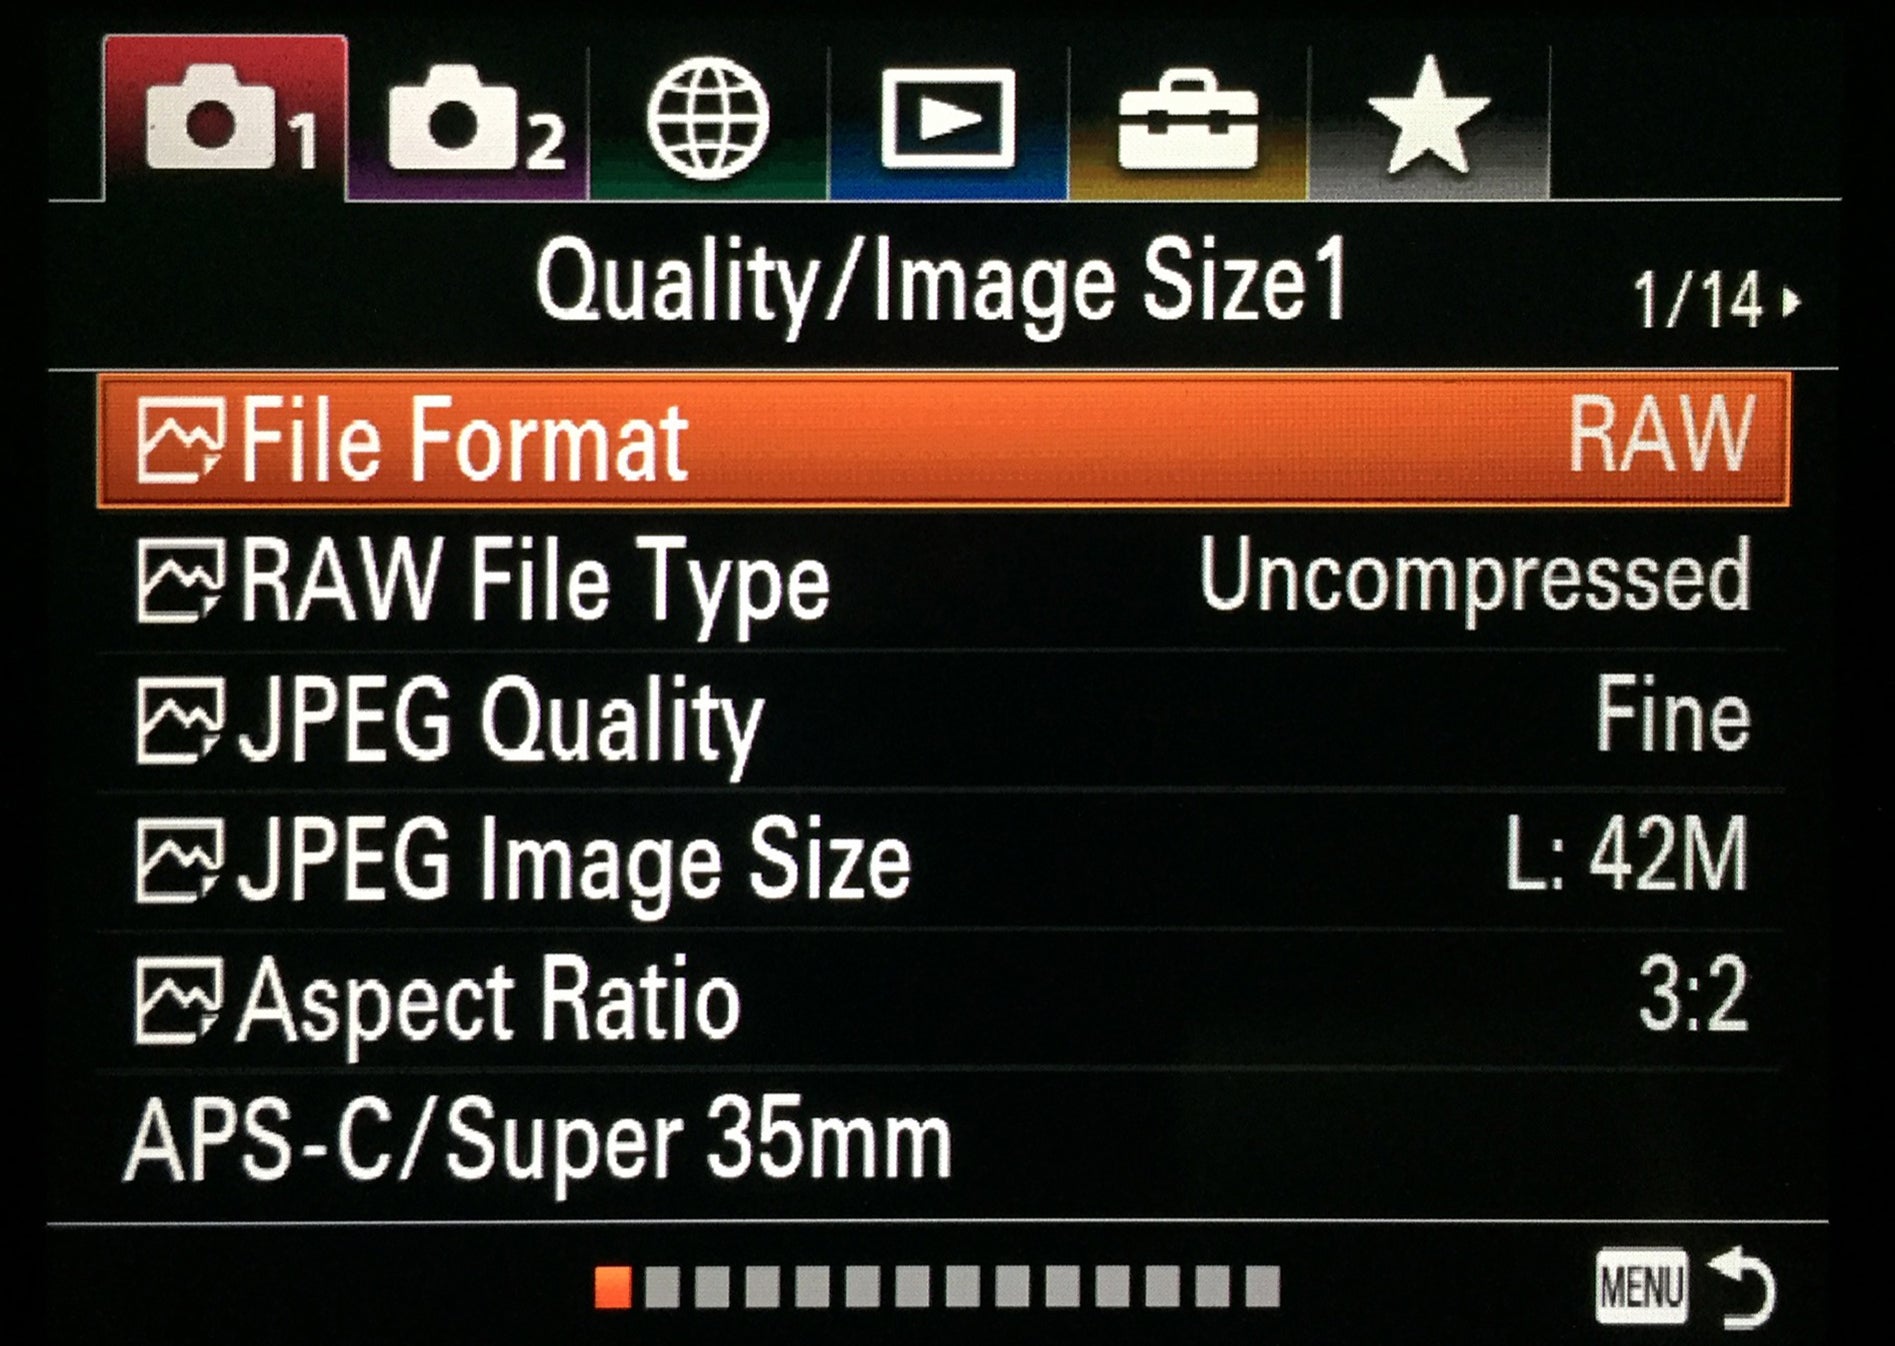
Set your camera to record RAW image files. Astrophotography can be broadly split into two separate areas — photography and post-processing. In order to process your newly acquired Astro images back at home, you will need to shoot in RAW so that you capture and retain as much data as possible. A RAW file is the information from the camera’s sensor with no processing applied.
Recording JPEG images will give you smaller files, but the compression process throws away important data you could use. If necessary, buy a larger memory card that can handle RAW files rather than shoot JPEG.
Shutter Speed
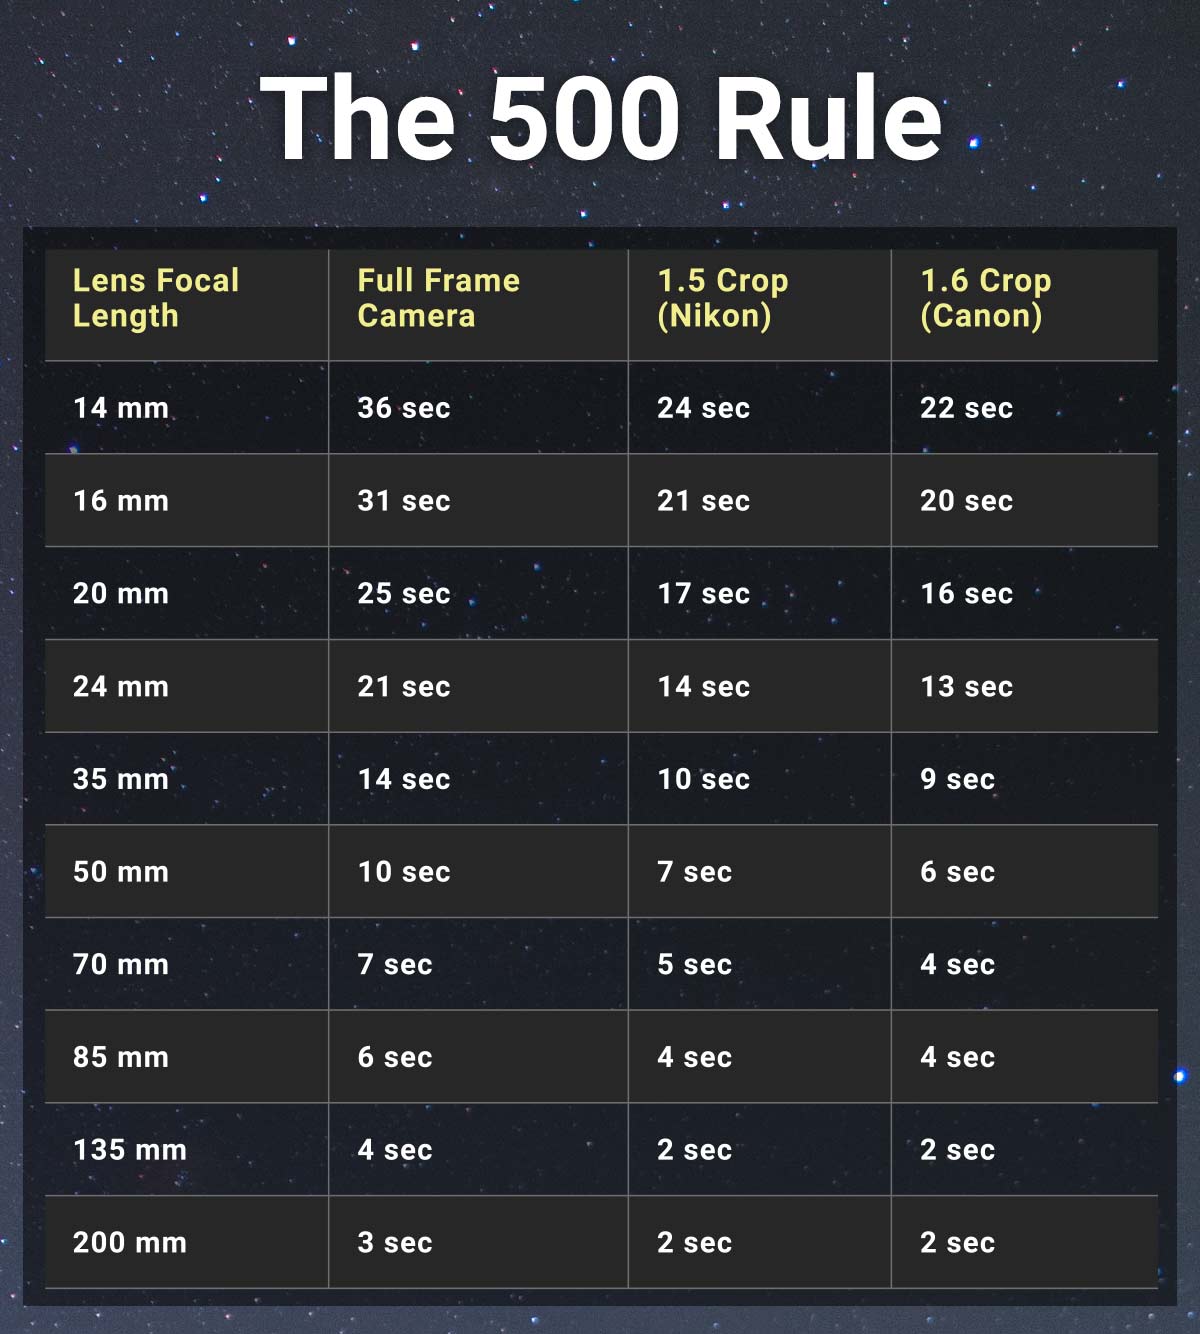
The aim of astrophotography is to capture as much light as you can while minimizing the movement of the stars in the image — unless you’re deliberately trying to create star trails. The longer the focal length of your lens, the shorter the shutter speed will need to be in order to avoid capturing star trails. There’s a simple formula to calculate the correct shutter speed for any given lens, called the ‘500-rule’. In its simplest form, this is 500 divided by the focal length of your lens. For example, if you are using a 20mm lens, this would be 500 / 20mm = 25 seconds. This, however, only applies to full-frame cameras. For a crop sensor camera, the crop factor needs to be taken into account, so in this instance, we would recommend using a base value of 300 for APS-C cameras, and 250 for Micro Four Thirds cameras. Start with an exposure of 20 seconds, which is about the longest you can leave the shutter open before stars begin to trail and see how that looks. You can then adjust as needed.
Conclusion
Astrophotography is one of the most rewarding hobbies. Sure, it has a steep learning curve, can get costly, and is frustrating at times, but the end result is always worth it! With a little trial and error, it won’t be long before you start capturing some amazing night sky images. The beauty of astrophotography is there are so many objects you can capture; there is a whole universe to explore. Hopefully by now, you have a much more definite idea of how a beginner should get started in astrophotography. A little tip if your a complete beginner – Start small, with a DSLR camera and a tripod, and upgrade only when you feel ready and confident. Good Luck and get out there and capture some great images!
Thank you for visiting my blog and reading today’s post, I hope you found it insightful and helpful. Have a great week and I shall see you next Wednesday!


Wow, what a post! Thank you for doing this post on Astrophotography. I look forward to your post every week, especially all about photography, it is always incite full and packed with useful and helpful information. Keep up the good work. 🙂👏👏
LikeLiked by 1 person
It does look daunting, that start-up ramp to get going with this hobby. Also one has to have some proximity to pretty dark skies, ad that is getting rarer and rarer nowadays. I want to show my son how the night sky really is — and am wondering If I should plan a trip to the Sahara 🙂
Anyway, nice detailed post. Thanks!
LikeLiked by 1 person
Thank you very much. Yes it is getting rarer these days, I agree with you there. That sounds like an excellent idea, I’m sure he’ll love it, it would be both an educational and great experience for him, plus you can take so many fantastic pictures! 😃
LikeLike
Some useful points in there, I think astrophotography is something that requires skill built from experience and a lot of patience. I’m still learning.
LikeLiked by 1 person
Great job!
LikeLiked by 1 person
Terrific post!
LikeLiked by 1 person